The first game in any series tends as a rule to be a little rough. Mega Man I is no exception. The game's controls and design were not as fully realized as in later games, and the quality does not quite compare as a result. However, I am approaching this game not as a critic but as a theorist, so I will stick to making observations rather than judgments as much as possible, though some criticism will be inevitable. Here are the salient features of Mega Man I in comparison to the rest of the series:
- Due to inferior design choices (which I assume were due to inexperience) and the lack of any difficulty-moderating mechanisms (notably E-Tanks, which were added in the very next game), the game has a much more frustrating learning curve than later games, especially towards the end.
- Enemy design is simpler, both in behavior and visuals, than is typical in later games, though the iconic Hard Hats (Mets) do make their first appearance here, as well as a few others (like Spines).
- Unlike in later games, water is a purely visual element in stage design in Mega Man, having no effect on Mega Man's jump physics.
- As in Mega Man II, Mega Man has only his normal shot and jump for basic actions. The slide would not appear until III, and the charge shot until IV.
- There are only six Robot Masters instead of the series standard eight.
- Movement is a bit more laggy than in later games, by a couple of frames - not much, but enough to make for frustrating mistakes here and there if one does not take it into account. Hit detection, while quite serviceable and good for the time, is also markedly inferior.
A Quick Note on Stage Order
Because the Robot Master stages in each Mega Man game can theoretically be won in any order, my choice of ordering is going to be at least partly arbitrary. I will be dealing with them in the order that I myself have tended to traditionally play them, and since the design of each game usually does provide one or two stages and bosses that are easier than others, likely some of my readers will find my ordering similar to their own preference. Where there is a clear reason to prefer one order over another, I will mention it in the stage entry; otherwise I will leave the issue alone.
A Quick Note on Stage Divisions
 |
| Right, down, right, boss. |
Due to the way scrolling works in Mega Man games, stages tend usually to divide themselves naturally into horizontal stretches divided by vertical ones; the smooth scrolling horizontally preserves a sense of continuity that vertical scrolling pretty clearly breaks up. For the most part, I will be following this natural logic in my discussions, because the developers mostly worked with it to divide and organize the elements of each stage. Because of this, some 'sections' will be much shorter than others (even a single screen), and different stages will have different numbers of sections. I feel this is preferable to dividing things artificially into the same number of sections; hopefully it doesn't become confusing.
A Quick Note on Map Images
To simplify my sourcing citations, from now on, unless otherwise indicated, all non-screenshot map images (including the one directly above) that I use will be taken from (and sometimes modified from) this site. It's a pretty comprehensive collection, and well worth your time to check out if you have a few moments. Because I don't want people to forget, I will include re-posts of that link every few posts or so.
A Quick Note on Terminology
As I may possibly have stated in an earlier post, my goal with this blog is to create a 'design lexicon' of devices used by the developers of old games to create varied experiences with limited elements. Therefore, my focus in analyzing the stages will be on isolating, naming, and describing these features. On the off-chance that anyone with professional game-design experience is reading this blog my terminology may seem strange, unprofessional, or unnecessary; I don't know, because I don't know how much mainstream game design science has dealt with this issue. These terms are primarily for me, to aid my own game development aspirations, but I welcome their adoption by anyone who finds them useful or interesting.
Most of my terms will contain either the word 'Choice' or the word 'Challenge', since most of a game's features on the level I am discussing are one of the two; this will make it easier to organize the terms later as well. Every so often I will make a post specifically to list and define the terms I have created so far, with examples given to show their uses and effects.
Bomb Man: The First StageMost of my terms will contain either the word 'Choice' or the word 'Challenge', since most of a game's features on the level I am discussing are one of the two; this will make it easier to organize the terms later as well. Every so often I will make a post specifically to list and define the terms I have created so far, with examples given to show their uses and effects.
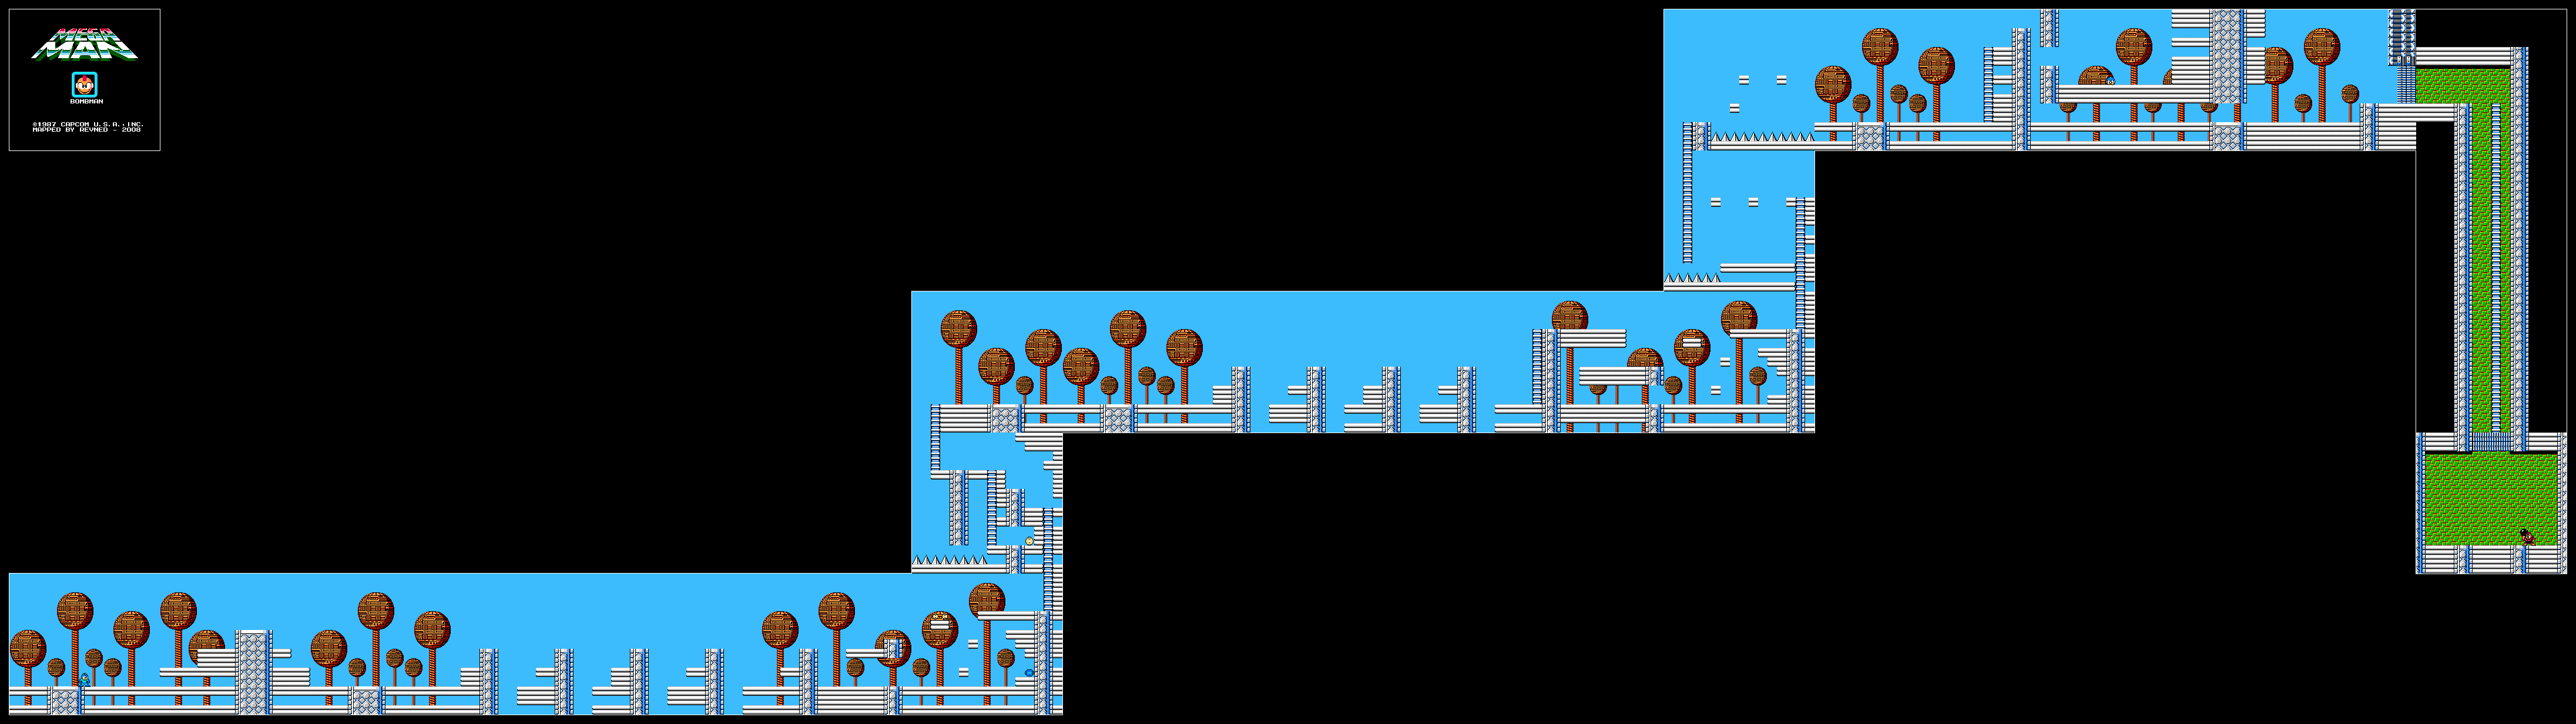
I have always followed the same basic order playing Mega Man I, starting with Bomb Man, probably because I read the NES Game Atlas as a child. The stage even looks like a starting area, with its baby-blue sky background and...trees? Are those trees? Mechanical trees? Logic of place seems to have been wholly eschewed here in favor of visual effect; the vertical tree...things and horizontal platforms provide a clear sense of structure and contrast in the layout. Hazards are scarce and mostly easily navigated, and challenges are paced and structured in a simple, tutorial fashion, while the steady, measured ascent provides a feeling of progression to the player's movement.
Part 1: Smooth Sailing
Map

Description
The first part of Bomb Man's stage is a very simple horizontal segment that divides roughly into three subsections, each characterized by its own terrain and challenge. All three provide the first example of things I will be adding to my Lexicon.
Breakdown
- This first structure forces the player to become acquainted with Mega Man's jump and shot in a low-pressure situation before moving on to the real challenges later in the stage. A few Fleas (the small, jumping robots) are placed on top of it to provide the illusion of challenge, but they are not a serious threat, causing only 2 points of damage to Mega Man on contact. One thing that strikes me is that their placement and behavior virtually guarantees that they will hit any player not actively expecting them, since they jump down on top of him; this may have been to inform inexperienced players that taking a hit is not a big deal - something that will certainly become important with later challenges. This structure is a basic tutorial, albeit disguised as a challenge, and therefore needs no special name; but tutorial elements are certainly an important element in the design of the Mega Man games and will be showing up later on.
- This series of jumps - the first real hazard so far - provides a movement challenge, as video footage will make clear. The Bombomb enemies that fly up from each pit explode into shrapnel, pelting the stage around them in such a way that a player who has moved up against a right-facing wall will not be struck as long as he does not jump; after the shrapnel clears, the reset timer for the previous Bombomb causes it to respawn, forcing the player to move forward again. Once more, the danger is very mild; Bombombs cause a minuscule 1 point of damage, so the only real danger comes if the player breaks the pacing and is struck into a pit. The only other feature of note in this area is that the terrain prevents a player from returning to the left - whether this was intentional as a way of signalling the direction of progress or not I am unsure. I will call this kind of challenge a 'Forced Pace Challenge', since its goal is to force the player to maintain a certain pace of movement and execute actions under time pressure. We will be seeing more of these both in this game and in later ones in the series; they are a common feature of the Mega Man games, since they provide a natural mechanism for giving a stage a sense of urgency in the absence of a timer or automatically-scrolling screen (the NES games in the franchise use the latter device only once, in IV).
- This area is the beginning of what will prove a common feature in the Mega Man I: a small split in the level's path allowing the player to choose his approach:

This particular choice is minor; the player can choose to go along the bottom, taking out the Screw Bombers as he does, or else brave their fire and the long jumps to save time. Once again, the risk of either path is low here; there are no instant-death hazards and the Screw Bombers do only 2 points of damage with a shot. Taking the top path will make it difficult not to get hit, but since doing so costs only 2 health points and there are two Small Life Energy powerups along the way (enough to heal two such hits), it is a perfectly viable option even for a very inexperienced player. I will call this a 'Path Choice'; the term is self-explanatory, and will form the basis for several variations, of which this is properly an 'Equivalent Path Choice', since both paths lead quickly to the same place with little difference in challenge. Not every Mega Man game features many Path Choices, but they are quite common in Mega Man I. Technically the life-restoring drops on the upper path are an example of a 'Path Incentive', but since they are very easily accessible from either path, they are a weak example of it; we will see better examples elsewhere in the game.

Video Demonstration
Please enjoy this amateurishly edited compilation
of gameplay which I have created for your benefit.
Part 2: Quick Stop
Map

Description
Straight off here we see what will also prove a regular feature of the series, one which Egoraptor mentioned in his famous Sequelitis episode: a one-room obstacle course. The structure is fairly easy to grasp, and due to the peculiar mode of scrolling in Mega Man games, movement is almost always vertical in these rooms. No need to re-invent the wheel; I will simply call these OROCs. This one is a low-pressure example suitable for introducing the player to a couple of hazards that will be used in more difficult situations later in the stage.

Video Demonstration
Breakdown
- Four Beaks line the right side of this hanging column, timed to open in staggered groups of two, creating a chaotic spray of shots that can still be navigated without taking damage by a careful and experienced player. The way they are timed, shooting them from the ladder on the right is fairly easy as well - particularly notable is the fact that the bottom-most one opens up just as a player who moves up the ladder without pausing reaches its horizontal level, giving the player a clear indication of the enemy's weakness (Beaks can only be damaged when open). The worst thing that can happen if a player takes damage from a stray shot (unless he has been very careless in the previous section) is falling back down the ladder to the previous screen. The ladder in front of the Beaks is not necessary to progress in the game, and serves only to provide a path to the Big Life Energy; it is safe only if the player deals with the Beaks earlier, and is our first example of an 'Optional Path Choice'.
- This Big Life Energy heals 10 points, enough to fully replenish any health the player is likely to have suffered by this point; however, the player must deal with the beaks to get it safely, providing an incentive not just to breeze by them. Because this power-up provides a bonus that is sufficiently off the main path to warrant braving the Optional Path to get, it is a better example of a Path Incentive than the Small Life Energy power-ups from earlier. We will see another Path Incentive at the end of Bomb Man's stage. The Beaks themselves are not a good example of an Optional Path Challenge, since their placement makes them a present threat whether the player chooses the option or not. We will see a good example of an Optional Path Challenge at the end of the stage.
- These are the first spikes the player encounters in this level. Their placement at the bottom of the screen, in a location where he could not escape if he fell anyway, clearly indicates their threat while rendering the actual danger they pose fairly minuscule - unless a player tries to get the life power-up without handling the Beaks or foolishly runs past the ladder on the top, it is essentially impossible to make contact with them. The fifth area of the stage will feature far more dangerously placed spikes, so this serves as a low-pressure introduction to the hazard before the player has to deal with a serious challenge involving it; this is a basic tutorial method common to all games, and not worth making up a special name.
Video Demonstration
Part 3: A Change of Pace
Map

Description
The visual similarities between the first and third parts of Bomb Man's stage are obvious instantly; the middle area is identical in terrain, and the beginning and end are highly similar - a very simple area and a Path Choice, respectively. But they are not quite so similar as they appear at first; the design features layered over the terrain are almost completely different, as we will see.
Breakdown
- Here we see our first example of a 'Forced Encounter Challenge'. A lone Sniper Joe jumps in as soon as the player dismounts the ladder and begins moving right, and the nature of its behavior forces the player to either deal with it on the game's terms or else suffer repeated hits as it continues to jump to follow the player's movement, even across the broken terrain in the center of the area. The only effective choice is to engage it at the start. The defining quality of a Forced Encounter Challenge is that the player does not have the option of merely taking a hit and skipping it; this can be accomplished through enemy behavior (as it is here), or through scripts that do not allow progress until the encounter is finished (as in many mini-bosses in later Mega Man games, and, for that matter, the Robot Master encounters in all of them).
- Though this terrain is identical to the terrain in the middle of the first area, the enemies programmed in are quite different. Rather than timer-run Bombombs popping up to force a pace on the player, instead Killer Bullets (a cross between Bullet Bills from Super Mario Bros. and Medusa Heads from Castlevania) continually spawn from the right side of the screen while Beaks dot the left-facing sides of the columns - a combination I will call a 'Threat Management Challenge', since the key to survival is dealing with each minor hazard quickly to prevent being overwhelmed. A Threat Management Challenge provides a way to build difficult gameplay out of individually trivial encounters; by themselves, neither the Beaks nor the Killer Bullets would pose a serious threat, but the constantly spawning Killer Bullets force the player to slow down enough that the Beaks have time to open and begin firing; meanwhile, a player who does not kill a Killer Bullet quickly enough risks being knocked by the resulting explosion back into a pit. Every element here combines with the others to force a style of play that is more cautious and measured than the earlier sections required. The Forced Encounter Challenge earlier perhaps serves to warn the player of this coming shift in pacing.
- I'm going to be honest...I don't know what the developers were going for here. At first glance it looks like an Equivalent Path Choice, but it isn't.

In the diagram above, the red lines represent the paths of Spine enemies - low-profile indestructible enemies that sweep back and forth, accelerating when Mega Man is on the same horizontal level, and providing a clear hazard that any player will instinctively want to avoid. The green and magenta lines represent possible paths through the area. The green path is clearly the one that covers the least area threatened by spines, and therefore is the obvious 'best' path; meanwhile, there are no incentives provided whatsoever to take the optional (and more dangerous, and in the left case even longer and less direct) magenta paths at all; in fact, stepping on the two-tile platform in the middle of the area virtually guarantees the player will take damage. The magenta paths provide no real option to the player, or even really the appearance of one. I would feel bad about it, but this isn't the only strange design choice in Mega Man I for which I have no good explanation. It isn't going in my lexicon because I don't know why a designer would do something like this. If anyone reading this has a suggestion as to what the motivation might have been, please say it in the comments section. I'd like to hear what people think.

Part 4: A More Dangerous Obstacle
Map

Description
Here we have another OROC to break the flow of the stage and divide the third part from the fifth and last before the boss. This one poses a more immediate hazard than the last - the spikes here are directly in either of the two paths the player can follow, and the Killer Bullets that continually spawn from the right can easily knock the player off the narrow platform in the top-left or the ladder moving forward. There is fair warning, however: a Killer Bullet spawns above the player immediately upon entering in such a way that the player cannot be hit by it, showing clearly the threat that is coming as well as providing a head-start, since only one appears on-screen at a time.
Breakdown
- As stated above, Killer Bullets continually spawn from the right on this screen. They are timed in such a way that if the player moves continually he can proceed through the screen without being in danger of hitting one, providing a weak Forced Pace Challenge, while the general layout provides an Equivalent Path Choice, wherein the player can exchange the immediate risk of a jump over the spikes and the long climb up the ladder for the trickier but less risky series of jumps across the tiny platforms above.
- The spikes here are the first time the stage uses them to genuinely threaten the player; moving carefully will keep him safe, but a careless move or moment of panic can end a run right here. Perhaps aware of this, the developers mercifully placed the respawn point here - as long as the player has lives remaining, a new run will begin at this point rather than at the start of the stage. This area marks the point at which the stage 'takes its gloves off', as it were, and expects the player to deal with some serious threats before reaching the boss. However, it does so in a less graceful way than later Mega Man games managed, as we will see.
Video Demonstration
Part 5: The End Run
Map

Description
This final horizontal section marks a fairly radical departure from the first two: a very stiff challenge at the start, followed by a rapid tapering-down before the entrance to Bomb Man's lair.
Breakdown
- This is more or less the 'climax' of Bomb Man's stage. The player has been thoroughly introduced to spikes now, and will be placed through a section of very difficult platforming in order to pass the stage. From the first ladder until the player reaches the top of the pillar in the center of the area, a new enemy type, the Flying Shell, will spawn continuously. Flying Shells are invincible except when they stop their horizontal movement and open, during which time they fire an 8-way spread of shots. The shots do little damage on their own, but are extremely hazardous when the player is navigating the treacherous footing above the spike field. In Mega Man I, unlike later games, touching spikes will kill the player instantly under any circumstances whatsoever, including during the invincibility period following a hit; because of this, taking a hit from a Flying Shell virtually guarantees instant death until the player is safely across the spikes. This is a 'High Pressure Challenge', because a single-mistake carries an enormous penalty. Unfortunately, this is also the first time the player has encountered a Flying Shell in this stage, and while the placement of the ladder guarantees he will have a chance to see its behavior before dealing with it over the spikes, an inexperienced player who plays this stage first will not have had enough time to get used to dealing with it before having to do so under intense pressure. This is an ungraceful spike in difficulty that would become much less common later in the series.
- In this area we see another Optional Path Choice, with both an Optional Path Incentive in the form of a (possibly much-needed) 1-Up and an Optional Path Challenge in the form of a lone Sniper Joe. The Sniper Joe is placed in such a way that a player standing in the gap of the column can safely fire to catch the enemy while it is jumping (and harmless), reducing the challenge to little more than a time-sink. However, due to the relatively small area, a player with a large amount of health might legitimately choose to streamline the process by merely taking the hit (a fairly minor 4-point one) and using the invincibility period to run past the Sniper Joe, collect the 1-Up, and safely retreat. The possibility of this choice is something I will call a 'Loss-Condition Choice', and they are common in Mega Man stages, to the point that an experienced player will frequently choose to take a weak hit in order to skip a greater challenge. This is made possible by the generous period of invincibility after taking damage, and the large amount of health Mega Man begins each stage with.
- The player encounters one more Sniper Joe here, this time placed on the raised platform in front of the gate. Its placement above the player renders it a much greater threat than the one guarding the 1-Up, since the player must time a jump directly into its line of fire in order to successfully hit it. Because of this, the Loss-Condition Choice is often favorable here, since taking a single hit and merely running past it to the safety of the gate often results in less damage than concluding the encounter through combat, especially for a less expert player.
Video Demonstration
Part 5: An Explosive... No, No Puns. Bomb Man's Encounter
Map
 |
| Prepare for an explosive fight! Blast it, I said no puns. Ah, well, no need to blow up over it. That last one was pretty forced; better stop before I bomb out. |
Description
The long and non-horizontal approach from the first gate to the second is a unique feature of Mega Man I, one that was never repeated in any future Mega Man game - and for good reason. It adds no significant challenge to the level, only annoyance, and if anything serves to decrease the impact of the feature. In most of the stages, the challenges presented in the staging area have no relation to those in the main stage (as here, where the player encounters an enemy seen nowhere else in this stage), are either trivial or disruptive, and waste time between attempts to beat the stage boss.
Breakdown
First of all, there is nothing in the corridor worth naming. There is nothing in any of these corridors worth naming or analyzing; I am only including them for the sake of completeness. In later games, where these corridors are merely a single screen of horizontal tunnel, I will not even mention them. Feel free to skip the first entry in this breakdown, and the corresponding one in every stage, and go straight to the description of the boss.
- This vertical corridor contains four Octopus Batteries (yes, that is the enemy's name, and no, I have no bleeping idea why they're called that) moving back and forth, timed so that a player who chooses to fall down the ladder is guaranteed to take a hit from one. So basically, it's simply a trap to punish any player who chooses to expedite his passage to the boss. I reiterate: these sections are terrible. The challenge of avoiding them is trivial if taken carefully, and merely serves to slow a careful player down or punish a hasty one. It is the only place in Bomb Man's stage where Octopus Batteries appear, so it is not a test of anything, nor does it effectively teach the player anything that he does not have a chance to learn elsewhere, nor is it a culmination of anything; I have no idea why the developers thought it would be good to put them there. The End.
- Bomb Man, like most Robot Masters in Mega Man I, has a fairly simple AI: he jumps around the screen, tending to stay away from Mega Man, and throws bombs across the screen at an arc. When they hit the ground (at Mega Man's feet) they explode in a manner similar to the Killer Bullets from the stage, forcing Mega Man to jump away if he is close to avoid taking damage. This fight is fairly easy; Bomb Man takes 2 points of damage from a shot from the Mega Buster, and 4 points from the Fire Storm (Fire Man's weapon), his weakness. I am not, at present, going to invent terms for the Robot Master AI design choices, that not being my goal in analyzing the Mega Man series, but later on I might go through several from many different games all at once to see if I can find some similarities or patterns. My big question is: does Bomb Man's encounter force the player to use anything he learned in the stage?
...
No. No, I don't think so. If anyone reading this has a suggestion, feel free to speak up, but I don't see any meaningful way in which this battle forms an extension or complication of any of the lessons seen in this stage so far.
Next post: I put everything in this analysis together to create a 'design map' for the entire stage, with several points of analysis, and critique it! And, unless I find some problem with this procedure, that is how I plan to do every stage in every game from here on out: step-by-step analysis, synthesis, critique.* By doing so, I hope to build a body of reference knowledge and analysis techniques by which to duplicate, and possibly even improve upon, the unique 'feel' of the Mega Man series. I'll probably fail, especially at the latter goal, but I like to aim high, and I'll certainly learn something either way. Hopefully you will too.
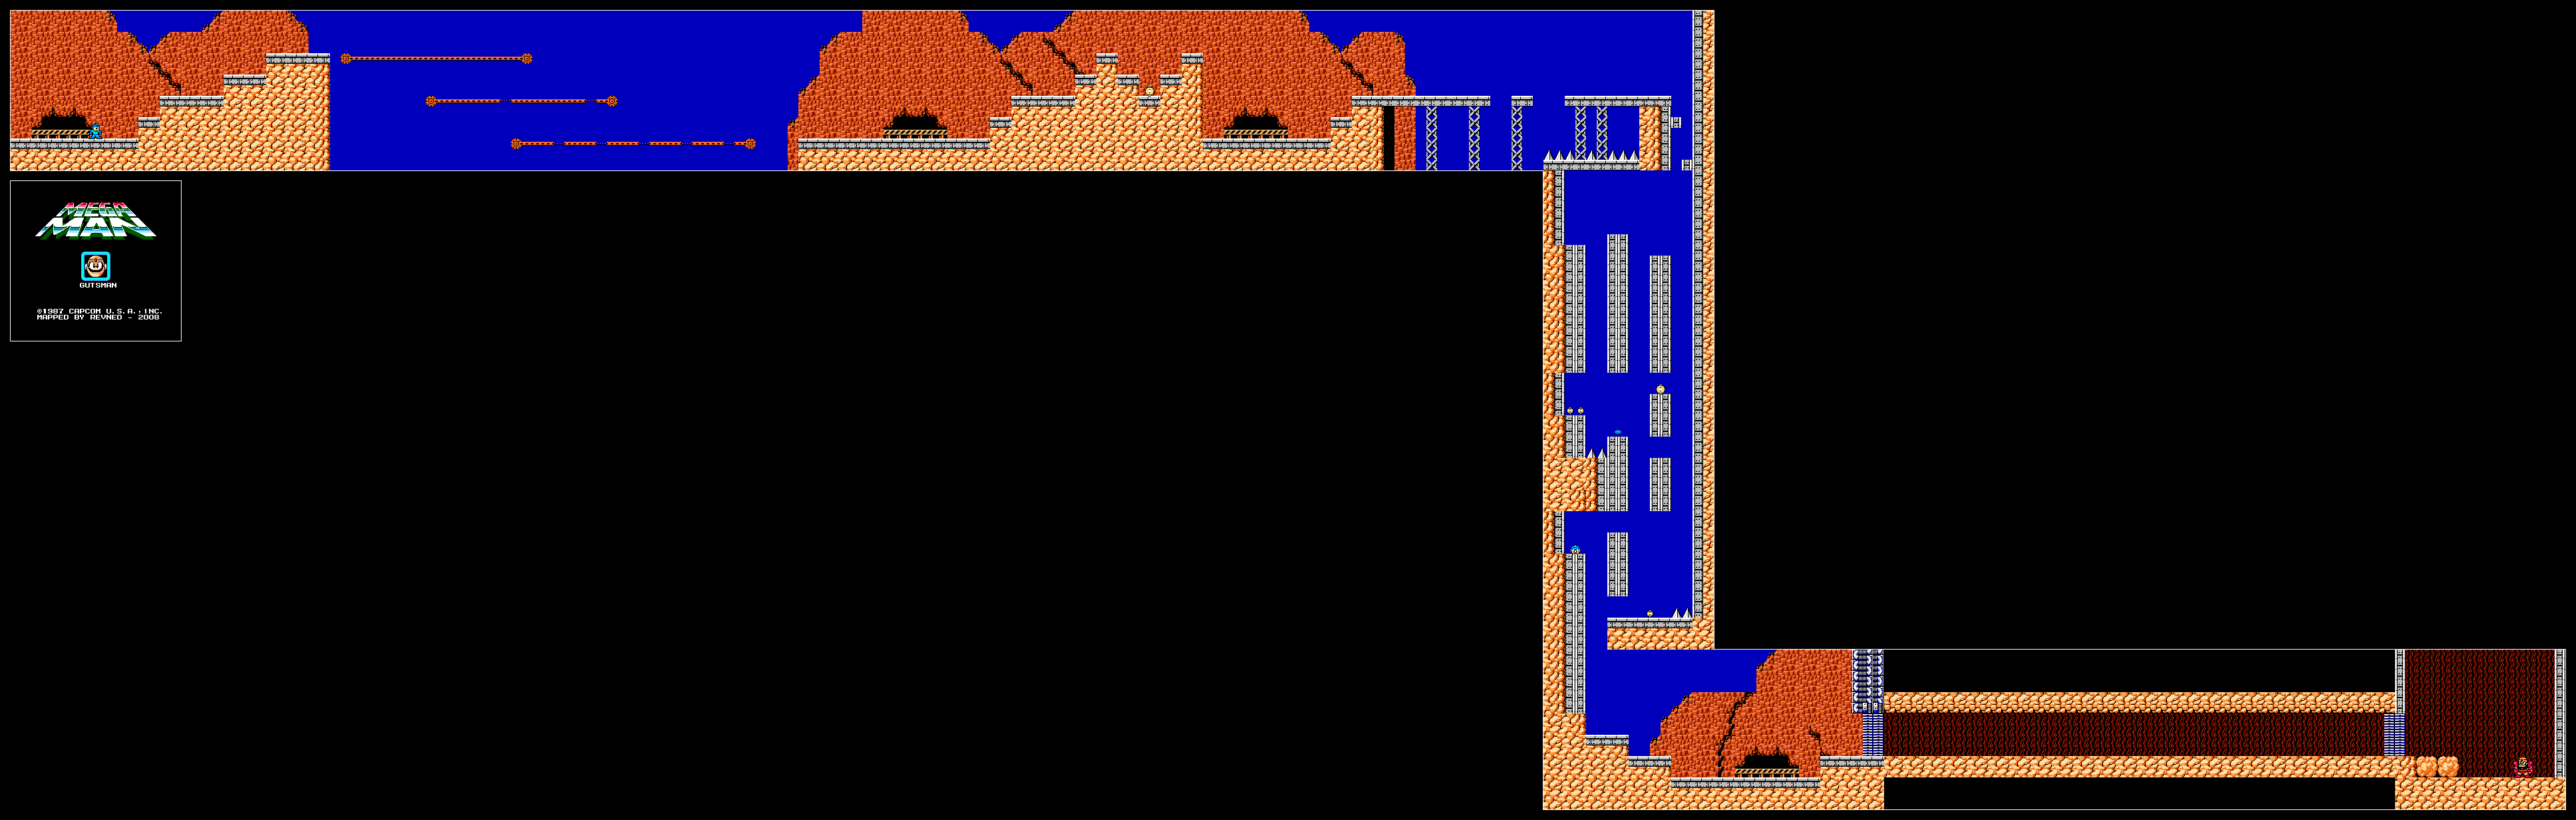
* This does not necessarily mean that I will always take two posts to do so; this one is especially long both because the stage is one of the longer ones in the game and because all the concepts in it were, obviously, introduced here for the first time, thus requiring more words to explain properly. Guts Man's stage, which I will do next, is less than half the length of this one and will likely take only one post.
* This does not necessarily mean that I will always take two posts to do so; this one is especially long both because the stage is one of the longer ones in the game and because all the concepts in it were, obviously, introduced here for the first time, thus requiring more words to explain properly. Guts Man's stage, which I will do next, is less than half the length of this one and will likely take only one post.
Thanks for reading,
The Undesigner
The Undesigner
I don't think I've ever seen an existing level design so scrutinizingly analyzed. The videos with captions are a great supplement. Keep it up!
ReplyDelete